|
|
|
|
A Purchase Order (PO) is used to control the purchasing of products and services (e.g.: labor, items such as keyboards, etc.) from external vendors, and can be related to many Vendor Invoices. A PO is intended to represent a binding contract between the organization issuing the PO and the vendor. An approved PO is a commitment and will be included on the commitment reports.
Purchase Orders can be related to a Purchase Requisition (PR), but this is not required if the system property Allow creating a PO without a PR (unanet.purchasing.po.can_create_without_pr) is checked.
If the Purchase Order is related to a PR, and the PR has detail lines, you can only add PO lines in sections where the PR has lines. If the PR has no detail lines, the PO can have detail lines in any section (labor/expense/item). For example, if the PR only has labor detail lines, then you can only add PO labor detail lines. You are not required to enter details lines for the PO or its Mods. POs can have a maximum of 9999 detail lines.
If PR lines exist in the PR document, the PO grid on the page will contain only the PR lines where the period of performance (POP) overlaps with the PO Summary POP. For example, if the POP on the PO Summary is 1/1/2017 to 1/31/2017, and the PR line POP is 2/1/2017 to 2/28/2017, then that PR line would not be available to be selected. However, if the POP on the PO Summary is 1/1/2017 to 1/31/2017, and the PR line POP is 1/31/2017 to 1/31/2017, then that PR line would be available to be selected. If there is at least 1 day overlap between the PR line POP and the PO Summary POP, then the PR line is available to be selected.
You cannot edit detail lines:
If a project is specified on the PO summary, a warning message is displayed if the PO Summary Begin and End Dates are outside of the Project Revised Dates, i.e., the PO Begin Date is before the Project Revised Begin Date and the PO End Date is after the Project Revised End Date. Likewise for the detail lines, if a project is specified on the detail line, a warning message is displayed if the PO Line Begin and End Dates are outside of the Project Revised Dates. The same validation applies if a task is specified on the summary or detail line. These warnings will not prevent submission of the PO.
These screens are available to users having any of the following roles: Administrator, Purchaser, or Purchase Order Viewer.
Note: If the PO Owner of the original PO and the PO Owner of the PO Mods are different, the access will be determined as follows: If the Purchase Order Viewer has person organization access to the original PO Owner, then they can access all of the Mods for that PO, even if they don't have appropriate organization access to the Mod documents. Likewise for Purchasers - if they can see the original PO, then they can see all of the Mods, even if the Mod's organization is outside of their access.
These screens are available with the Project Financials family of Unanet licenses.
Topics covered on this help page include:
Search (to refine the list of Purchase Orders)
List (to view, edit, delete, open, or close Purchase Orders, or add Mods to POs)
Print/Email (to print or email POs)
Add (to add Purchase Orders)
Profile (to add PO Profile information)
Form (Purchase Order (PO) Format) (to add PO format options)
Alerts (to set performance alerts)
Other (to add User Defined Field (UDF) information)
Edit
Summary (to edit Purchase Order summary information)
Details - Labor (to edit Purchase Order labor details)
Details - Expenses (to edit Purchase Order expense details - expenses that do not require quantity, rate, or UOM)
Details - Items (to edit Purchase Order item details - expenses that do require quantity, rate, and UOM)
Views
View Current Document (to see current document view of a Purchase Order)
View Consolidated All (to see consolidated all view of a Purchase Order)
View Consolidated Approved (to see consolidated approved view of a Purchase Order)
Mods (to add a Mod to a PO)
You may also be interested in:
Purchasing (search for this topic in the Knowledge Center)
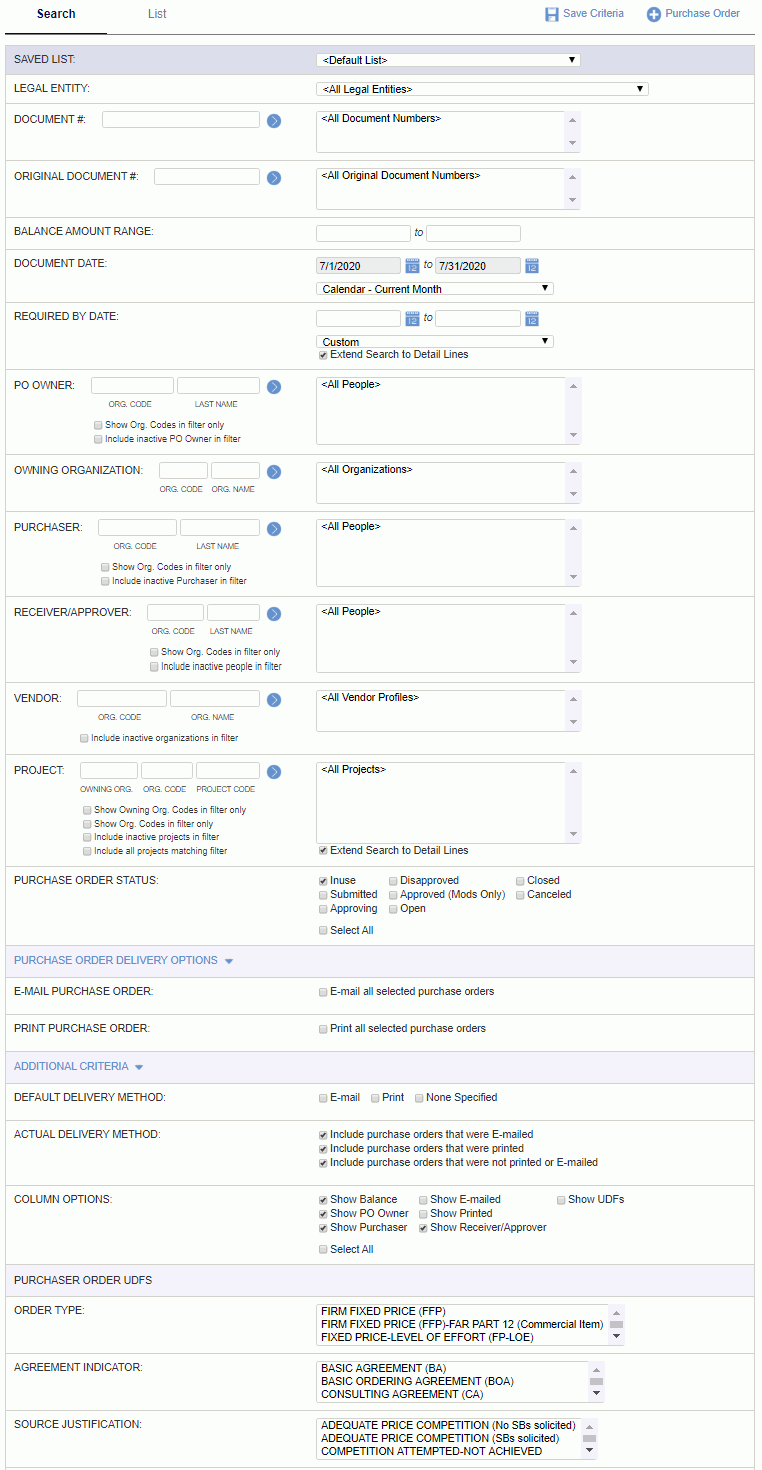
Using the Purchase Order (PO) search / list screen, you can search for and view existing entries. From this screen, you can also create, edit, delete, create a Mod, and open/close POs.
You can refine the list of Purchase Orders with which you are interested by supplying search criteria and clicking on the List tab.
|
|
|
The resulting list will resemble the following example. From this screen, you can use the available options to view, edit, delete, open or close a particular PO, add a PO, or add a Mod to a PO.

|
|
|
You can also click on the values in the Balance column to view the Consolidated Approved PO document, as in the following image.

Purchaser, Purchase Order Viewer, and Administrator roles can print and email purchase orders. See Print/Email Purchase Order for more information.
Clicking on the  link (available on the Purchase Order- Search/List screens), will present you with the Purchase Order- Profile screen where you will supply the summary information for a PO. After providing the summary level information, you can then navigate to the Detail Lines (by clicking on the Expenses, Labor or Items link in the left hand menu), and supply PO detail line items. You can save the PO without submitting, or click the submit button to save and submit.

Click on a link below to learn more about each tab on the PO profile:
 Profile (general information about a PO)
 Form (set up format options)
 Alerts (set up performance alerts)
 Other (additional user defined fields)
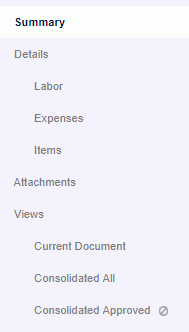
The Edit Purchase Order screen (which you can get to by navigating to the Summary left menu option after clicking the pencil icon from the PO list screen), is nearly identical to the PO Add screen. This screen displays the PO Document # and also includes a Document Totals section and PR Balances section (for PO with status of INUSE).
If the project or task associated with this PO does not allow expense, time, or item reporting, then the corresponding menu will be grayed out (i.e. Expenses, Labor, Items).
Also note that if you click on the Details link, it will take you to the first section that has data. For example, if Labor on the menu is grayed out (no data), then clicking on Details will take you to the Expenses section if it is not grayed out.

|
|
If the PO has been submitted and is in OPEN, CLOSED, APPROVED, or CANCELED status, the summary screen will look like the following image.
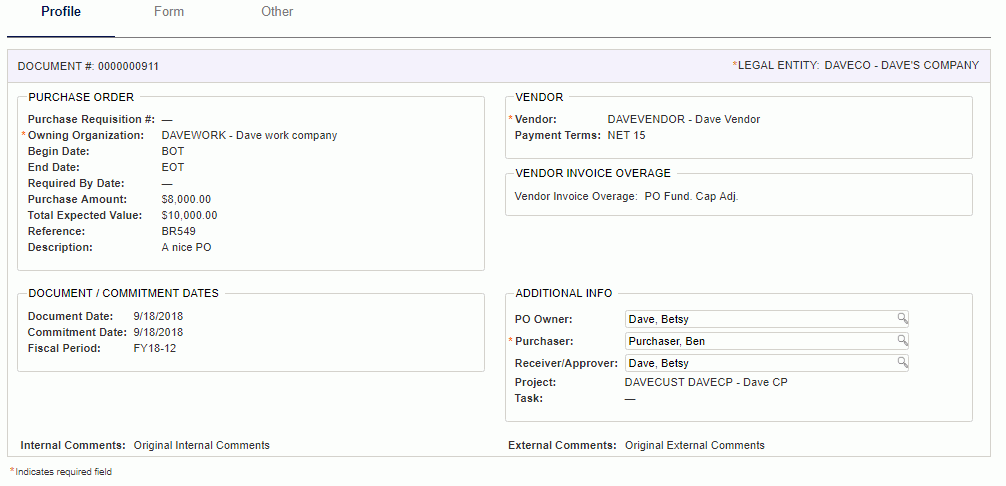
The following fields can be edited after the PO is approved. Only Administrator or Purchaser roles can modify.
If you need to edit a PO that has an OPEN status, then you can create a Mod for the PO or close the PO and create a new one.
Use this screen to enter the labor detail line items that comprise the PO. To get to this screen, click the pencil icon from the PO list screen and click on the Details>>Labor left menu option.
Header
The information in the 'header' section of the screen will recap the information provided on the document Summary.
Details Grid
This section of the Labor Details screen is where you will be entering the individual line items that make up the PO. The Approved PR Labor Lines will display if the PO is related to a PR. The Approved PO Labor Lines are the open lines from the original PO (displays if you are editing a Mod). New PO Labor Lines are the lines being added to this PO. You can click on the add detail icon -  - to create a PO line from a PR line or existing PO line. You can only create one line for each approved PO line, but you can create multiple lines from a single PR line.

|
|
|
|
|
Use this screen to enter the expense detail line items that comprise the PO. To get to this screen, click the pencil icon from the PO list screen and click on the Details>>Expenses left menu option.
Header
The information in the 'header' section of the screen will recap the information provided on the document Summary.
Details Grid
This section of the Expense Details screen is where you will be entering the individual line items that make up the PO. The Approved PR Expense Lines will display if the PO is related to a PR. The Approved PO Expense Lines are the open lines from the original PO (displays if you are editing a Mod). New PO Expense Lines are the lines being added to this PO. You can click on the add detail icon -  - to create a PO line from a PR line or existing PO line. You can only create one line for each approved PO line, but you can create multiple lines from a single PR line.

|
|
|
|
|
|
|
Use this screen to enter the item detail line items that comprise the PO. Items are those entries that have a UOM (Unit of Measure), quantity, and rate associated with them. To get to this screen, click the pencil icon from the PO list screen and click on the Details>>Items left menu option.
Header
The information in the 'header' section of the screen will recap the information provided on the document Summary.
Details Grid
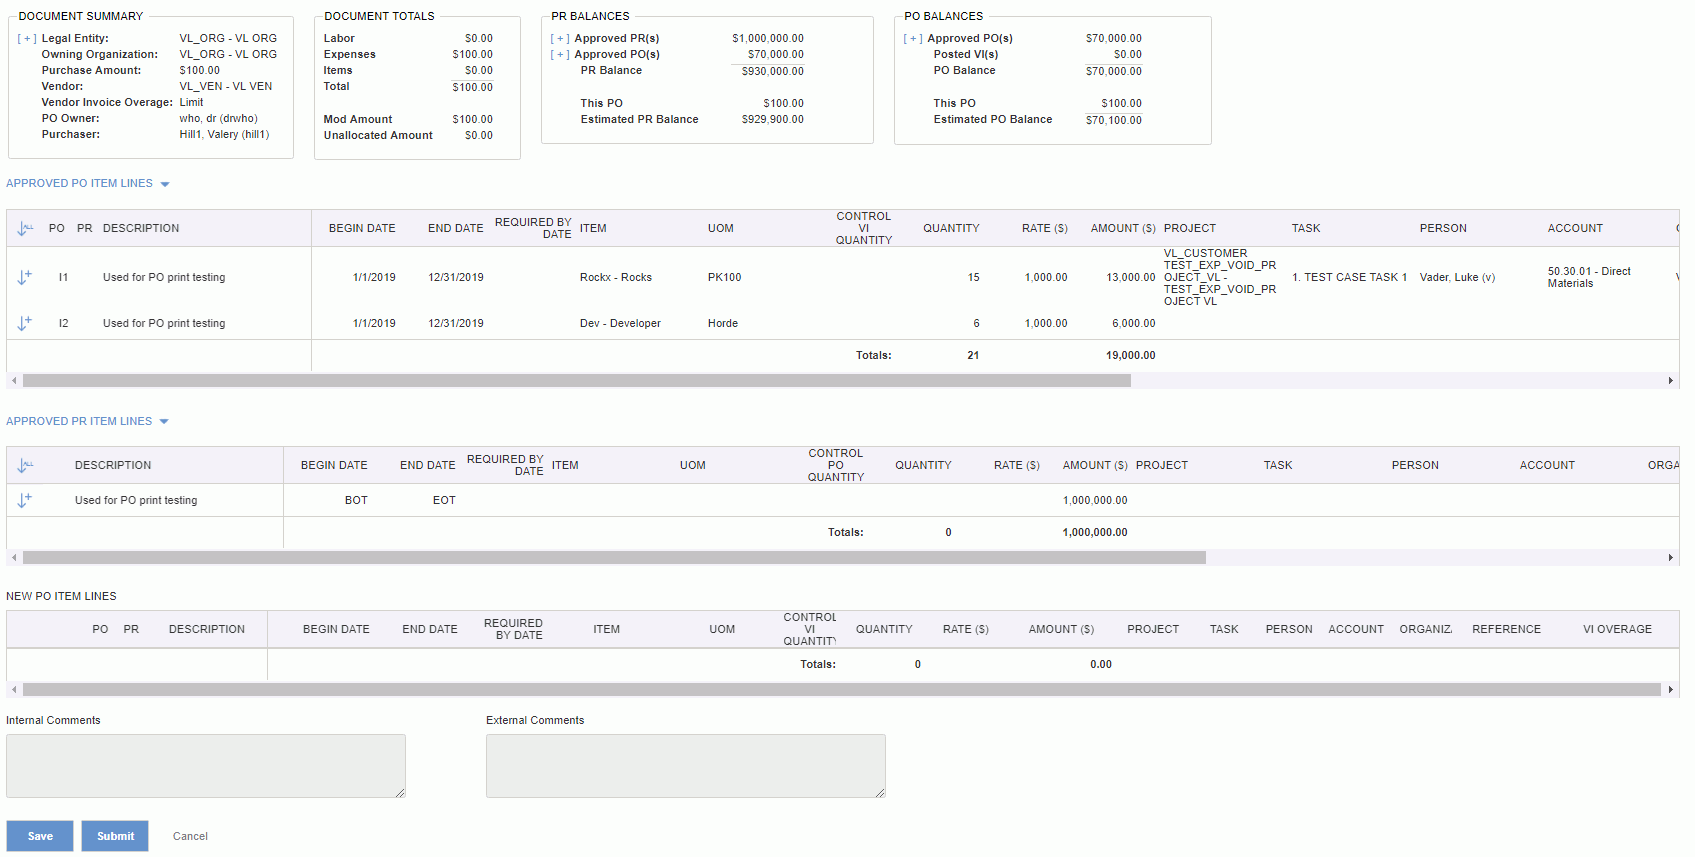
This section of the Items Details screen is where you will be entering the individual line items that make up the PO. The Approved PR Item Lines will display if the PO is related to a PR. The Approved PO Item Lines are the open lines from the original PO (displays if you are editing a Mod). New PO Item Lines are the lines being added to this PO. You can click on the add detail icon -  - to create a PO line from a PR line or existing PO line. You can only create one line for each approved PO line, but you can create multiple lines from a single PR line.
|
|
|
|
|
From this screen, you can attach one or more documents to a Purchase Order (which you can get to by navigating to the Attachments left menu option after clicking the pencil icon from the Purchase Order list screen). You can attach documents at the summary (Link to Current Document) or line level (Links to Current Details).
Attachments can be copied over to the Purchase Order from a Purchase Requisition (they will be linked to the Summary, not detail lines), and can be emailed to the vendor with the Purchase Order form.
You can add an attachment to a PO in any status. There are two ways to add an attachment: shared documents or drag and drop. For shared documents, you must have Document Manager, Document Viewer, or Project Document Viewer role, or be the primary or alternate Project Document Viewer for the related project. You can search for Shared Documents in the search field (use the % (percent sign) to populate the box with all available items). Shared documents are limited to those that have the same legal entity as the PO or have legal entity of "All Legal Entities", and to which you have organization access.
In addition, you may either drag and drop a file in the shaded area, or click anywhere on the shaded area, and a file selection dialog box will open.
Note: Drag and Drop option is not available in Internet Explorer and Edge. It is supported in Chrome, Firefox, and Safari.
To assist with the management of allowable attachment types and size, the administrator can use the following three properties: Maximum Size Allowed for each attachment (unanet.attachment.max_size), File Extensions that are Not Allowed (unanet.attachment.invalid_file_extensions) and File Extensions that are allowed (unanet.attachment.valid_file_extensions).

Using this screen, the user can add, remove or view an attachment. In order to view shared documents, you must have document access. The Save button will save the changes to the attachment screen. The Cancel button will not save any changes and will navigate back to the PO list screen.
You can only delete an attachment if the PO status is INUSE, or if you have added the attachment but not saved the PO yet, or if you are an administrator.
|
|
Where can attachments be seen?
The Purchase Order >> List screen will contain a paperclip ( ) icon to indicate attachments exist on a particular PO. Clicking on the icon will navigate the user to the Purchase Order >> View screen with the Attachment section expanded.
When viewing a PO that has attachments, the list of attachments will appear in a table as in the example below. You can click on the file name and view the attached document (for Shared Documents you must have organization access to the document).

This screen is available to view a read-only version of the PO document (which you can get to by navigating to the Views>>Current Document left menu option after clicking the pencil icon from the PO list screen or by clicking on the view icon on the PO >> List). Data displayed here is limited to the information supplied directly in this document, and not its original PO (if this is a Mod), or the summary of all Mods (if this is an Original Document).

You can click on the Show Details icon -  - in the Document Summary and PO Balances sections, if applicable, to expand to view more information.
This screen is available to view a read-only version of the PO and its Mods (which you can get to by navigating to the Views>>Consolidated All left menu option after clicking the pencil icon from the PO list screen or by clicking on the view icon on the PO >> List). Data displayed here is the information from the PO document with the highest Mod number (if Mods exist), excluding canceled documents.
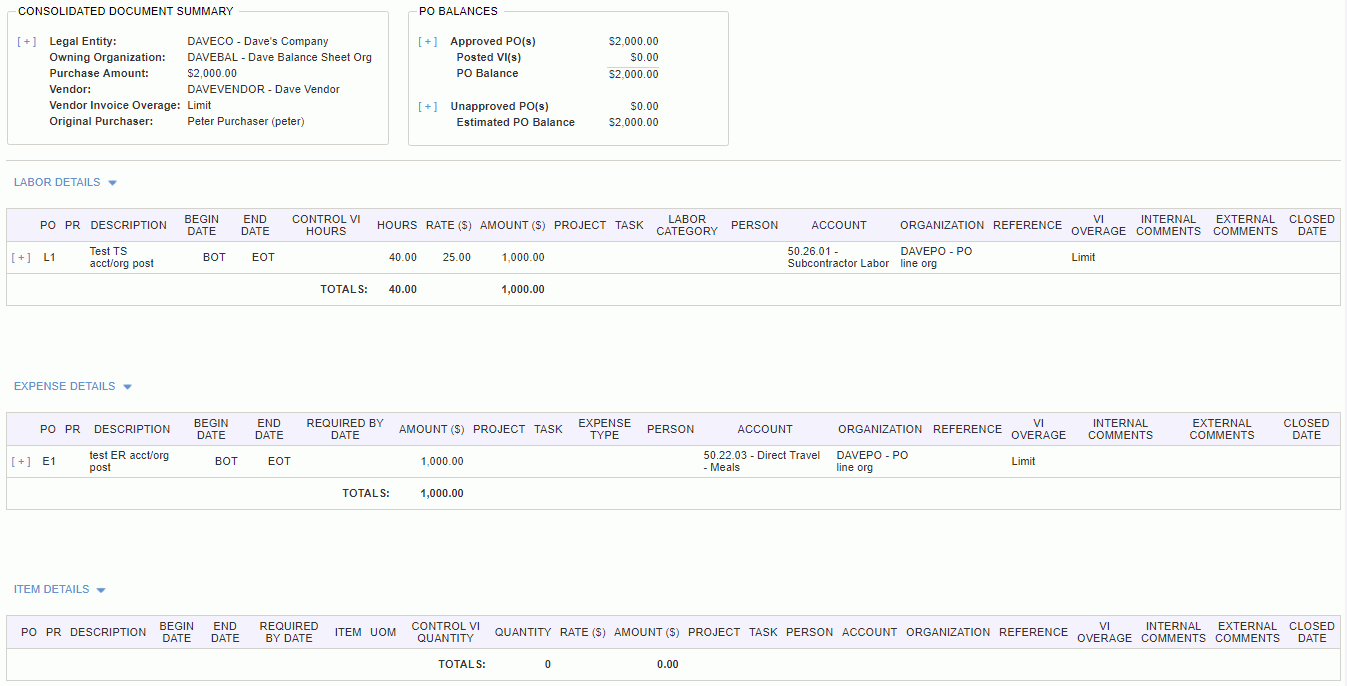
You can click on the Show Details icon -  - in the Document Summary, PO Balances, and detail lines sections, if applicable, to expand to view more information. For detail lines, it will display the history for those lines.
This screen is available to view a read-only version of the approved PO and its Mods (which you can get to by navigating to the Views>>Consolidated Approved left menu option after clicking the pencil icon from the PO list screen or by clicking on the view icon on the PO >> List). Data displayed here is the information from the original PO and its Mods for the approved documents only.
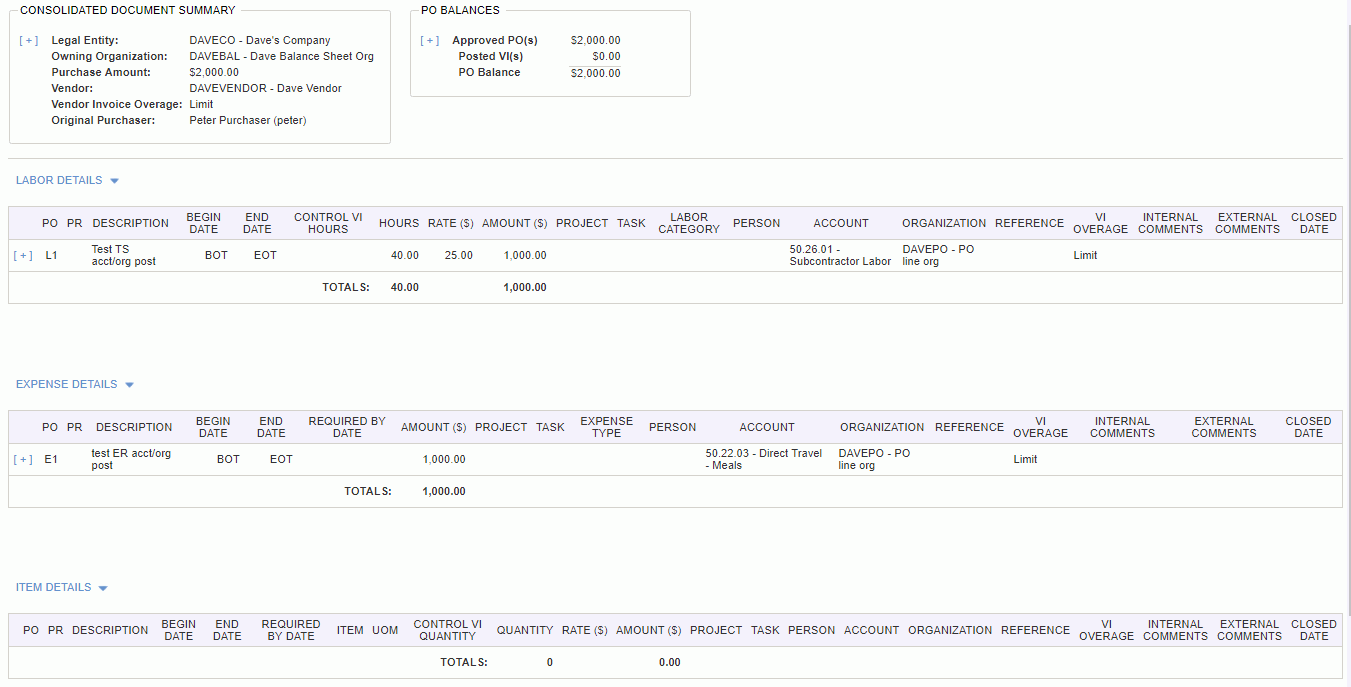
You can click on the Show Details icon -  - in the Document Summary, PO Balances, and detail lines sections, if applicable, to expand to view more information.
You may need to add a Mod to the document to change period of performance or labor hours, for example. Purchasers and Administrators can add a Mod to an original PO with Open status by clicking on the plus sign -  - on the List screen. The Create PO Mod screen is very similar to the Create PO screen except it has an editable Mod # field and you cannot edit some of the fields, like Legal Entity and Owning Organization.
You can also edit the Mod just like the original PO, including detail lines. However, some fields on the detail lines will be uneditable. If the original PO does not have detail lines and it is associated with a posted Vendor Invoice that has lines, then you cannot add detail lines to the Mod.
The Mod # starts at 1, and thereafter defaults to the highest Mod # plus one. Duplicate numbers are not allowed, i.e. an original document cannot have two Mods with the same number. Mod # is required on submittal, but can be null for INUSE and CANCELED statuses.
If you want to change a PO descriptor on an approved PO or PR detail line, you need to click on the add icon -  - and reverse out that line's amount (e.g. if approved line is $100, change to -$100). Then add a new line by clicking on this icon -
  - and set up the new line with the new descriptor fields. The descriptor fields are:
Warning: Changing the Mod # can create an invalid condition for VI overage limits. It is possible to create situations where the latest approved PO Mod requires VI(s) to be limited by the PO amounts, but the system already allowed posted VI transactions in excess of the PO amount. The following example illustrates how this could occur if a user reorders Mod numbers such that a more restrictive Mod becomes the latest approved instead of the previous Mod that was less restrictive. For example:
User creates Original PO with amount of $100, VI Overage set to limit.
User adds Mod 1 with amount of $100, VI Overage set to limit.
User adds Mod 2 with amount of $100, VI Overage set to not limit. User creates VI transactions for $500.
User changes Mod 1 number to 3, thus making it the latest approved Mod, which is more restrictive than Mod 2 which was set to not limit VI Overage.
Warning: Changing the Mod # could make the period of performance of the related purchasing documents invalid.
Note: The last approved Mod is the same as the maximum approved Mod number.
Note: The end status of an "approved" Mod is APPROVED, unlike the original document, which is OPEN or CLOSED.

|
|
|
You will see some widgets at the top of the PO Summary page for your created PO: Document Totals and possibly PR Balances, if the PO is associated to a PR. These widgets provide a snapshot view of the document and balances. The Document Totals widget only shows totals for the current document. The PR Balances widget lists the approved PRs and POs and related balances.
The Document Totals for Labor, Expenses, and Items will get updated with the amounts entered for the respective Labor, Expense, and Item detail lines.
The detail line and view pages will also display a PO Balances widget.
You will also see a Document Summary or Consolidated Document Summary at the top of detail or view pages.
See below for specific field descriptions.

|
|
|
|
|
If Purchase Order (approval_process.require.approval.purchase_order) is enabled, you must choose an approval group when you submit. Following is the process if approval is required:
In order to see a list of approval groups on the submit screen, the Purchaser on the PO must be a PO Submitter in an approval group, and must have an Assigned Group for Purchase Order Approval Groups in their Person Profile. See Purchasing Approval Groups.
Note: The PO will be re-validated upon approval. If the PO is no longer valid for approval, it will be automatically disapproved by the system.
See Purchasing Approvals for more information.
From the PO List page, Purchasers with financial organization access or Administrators can Open and Close original POs by clicking on the Open/Close Icons ( /
/ ). PO Mods cannot be closed at the summary level, however, approved Mod detail lines can be closed.
If lines exist on an Open PO, they can be open or closed as well. It is also possible for an Open PO to have all closed lines. A Closed PO can only have closed lines.
POs (or PO lines where applicable) cannot be closed if there are any outstanding documents:
Unapproved PO Mods
Unposted Vendor Invoices (if closing a detail line, all VIs associated with that line must be posted; if closing the entire PO, all VIs associated with that PO must be posted)
Uninvoiced timesheets or expense reports
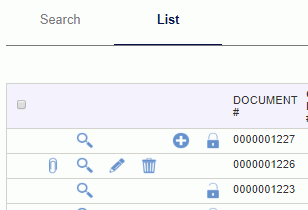
A popup will display after you click Open or Close and you can:
The popup will include detail lines from the approved Mods as well, similar to the Consolidated Approved view of the document.

Open POs will have sections for "Select Items to Close on" and "Select Items to Reopen". Closed POs will only have the "Select Items to Reopen" section.
The popup displays summary and detail lines (if they exist). PO summary lines are in bold with no line number; detail lines have a line number (e.g. "L1"). If you select a summary line to close, all of the open detail lines will be selected to close as well. You can deselect the summary line, and the detail lines stay selected. However, you can then deselect them as you wish. Only if the summary line is selected will the detail line check boxes be grayed out because you cannot close a PO at the summary level if it still has open detail lines.
When closing a line, you must select a closed date using the calendar icon or by typing in a date. The default date is today's date or the first open fiscal period date if today's date is in a closed period. The date must follow these rules:
for PO summary close date, must be on or after the latest approved PO or Mod Commitment date, and must be on or after the latest detail line closed date
for PO detail line close date, must be on or after the latest approved PO or Mod detail line commitment date
date cannot be in a closed fiscal period (unless you have Administrator role)
must be on or after any related Vendor Invoice posted date
When reopening lines in a closed PO, if you select at least one detail line to reopen, the summary line will be selected as well, because if the PO has at least one open detail line, the PO summary is open as well.
Simply click on the check boxes to select lines to open or close, and then click the Save button.